


")
If you made it here, you are likely wondering how to paint a room. It may sound quite simple but there is more to it than you may think. Seeing ‘before and afters’ make it look easy. Unfortunately, there’s a lot that goes into this process. We’ll go over some basic steps to getting your room looking the way you want. Getting a professional handyman would be the best way to execute this. Let’s look at 7 easy steps when painting a room!
Step 1: Protect Floors, Furniture, Windows, etc…
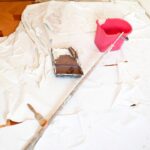
Drape masking or rosin paper down to the floor and carpet along the baseboards. Spread a drop cloth on the floor and over any furniture in the room. Let’s protect them from paint splatters and spills.
Step 2: Prep Your Walls and Any Trim

Before painting, wash all walls and trim with a heavy-duty cleaner of your choice. Shine a light on the wall to get a closer look at any imperfections on the surface. Then, knock down any nail pops and bumps you find on the walls. Following that, fill holes and cracks with spackle or patching compound. Sand all patches smooth with sandpaper. Always apply a coat of primer over the patched areas before painting. Finally, remember to remove outlets and switch plates.
Step 3: Paint the Ceiling First and the Trim Second

Before you begin painting the ceiling, use a 3/8-in. nap roller to paint the ceiling from one end of the room to the other. Roll the paint on in the same direction, one roller width at a time, overlapping the previous row. If a second coat is needed, roll the paint in the opposite direction you painted the first coat. Finally, paint the trim.
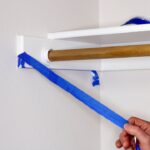
Step 4: Time to Tape
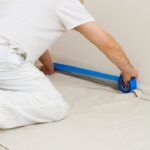
Always use painter’s tape when you’re painting to prevent paint from bleeding onto the wall. That way the walls will look clean and there will be a sharp, crisp edge between those two surfaces. Do NOT use masking tape as it will not give you a clean result.
Step 5: Cut the Edges with A Brush

You always want to cut in one wall at a time, then immediately roll out the wall while the cut-in paint is still wet. That way it blends much better with the wall paint.
Step 6: Roll Paint on Your Walls

Before you start painting, be sure to stir the paint with a paint stick. Be sure to fill the roller tray with a little over half-full with paint – too much paint will spill over. You should roll paint on the wall from the baseboard to the ceiling. Roll straight back down without reloading the roller to ensure the wall is covered. After that, your main goal is not to make any drips or smudges in the paint. You can always go back and clean them up afterward, but try and make sure none of that happens!
Step 7: Remove Tape and Clean-Up!
Before you can paint the trim and baseboards, score along the edge of it with a flexible putty knife. Always thoroughly clean your brushes and rollers with hot soapy water.
Conclusion
Painting can be quite labor-intensive. More than that, it’s easy to make mistakes along the way if you aren’t careful or completely know what you are doing. Let’s not forget the proper materials and tools needed to complete the task. Luckily our team of professionals has you covered. Contact us today if you are thinking about painting your home. Your end result will be a professionally painted wall, room, and or home.